The Whole Build
This is the build from the start all the way to the end all in date order
06/04/2011
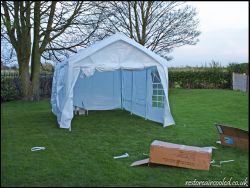
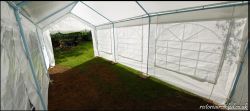
Today I received through the post a 6m x 3m gazebo with attached sides, I think that this will be plenty big enough for the beetle build to take place; it took me 2 or so hours with help from a friend of mine Michael to put the tent up. I suppose the high winds that we had today wasn't the best idea I have had but I wanted to make sure it was be enough. Any ways here are some pics
As you can see it is quite substantial in size but I think it may just be big enough! It took 2 hours to put up and yeah half of that to put down, I think to be fair it was harder to put it down that put it up and in typical fashion it won’t fit in the boxes but soon I will hopefully putting it because I will have a beetle.
07/04/2011
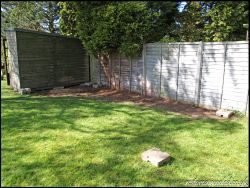
Continuing with the preparation with the storage of the beetle me and my dad decided to tidy round the back of the shed where we have decide to put the gazebo/tent this may sound easy but we took 2 or so hours to get rid of the crap that was hiding round there, we even managed to find 2 dead birds nice...
As you can see from the photos the block have been layout to show where the gazebo will go, also from the photos you can see where all the rubbish was stored because no grass has grown.
08/04/2011
Still carrying on with the prep me and my dad put the base down, this does sound easy but as always it isn’t. The piece of garden that I have chosen is behind the shed so it will be sheltered from a lot of the wind. When we initially put the block down they weren’t level so the first job was to sink some of the blocks so that the base was level. Then we construction the gazebo again! And put in onto the base, then bolted it down so that it isn’t going any were.
As you can see from the photos the floor is full of mud so the plant are to get 4 bits of 8 x 4 so that I am working on wood not the grass and mud.
11/04/2011
I have good new in the beetle searching part, I have managed to find a beetle that I am happy with and managed to get it nearly within budget £1150 to be exact, the best part is that the guy that I am buying them off will be bringing them 150 miles to my house which will save me a lot of time and money, I will be paying for them today and they should be getting to me on Thursday and Friday. It will take two day because there is another benefit about my purchase. There are two beetles and spares. I have been told by the buyer that one of the beetles has a engine and the other beetle has a very good body so I will be making one good beetle out of two not so good beetles. It also comes with a lot of spares which is quite handy and could save me a lot of money. The only bit that I can find wrong is that I will have to sight up to vwoc (vw owners club) for a birth date certificate to prove the dvla that I get free tax.
12/04/2011
When my dad had come home from work he had an early birthday surprise a snap on MIG welder. All I can say is that I am over the moon it some with some steel wire and a BOC gas bottle. But still waiting for the delivery of the two cars which should be here in 2 days.
14/04/2011
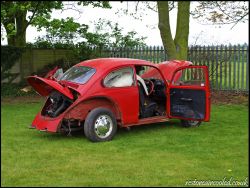
Well the day is finally here, the beetle has come the red one this is the one where I am getting a engine and gear box from all I can say it that I think its uber cool everything is so basic, must say the chassis and body is shot but this one isn’t the one I have been repairing, anyway here are the pics.
Here is how it arrived with a heap load of bits with it took some getting out of the car too.
15/04/2011
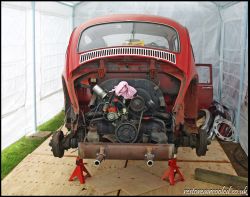
Small update today which is good, when I first got the red beetle it had two batteries in it I tried to fire the engine but they were flat so I left one on charge all night. Then this morning I got to the battery I had left on change put it in but it wasn't any good, must be too old. Anyway I took the battery out of my Clio put it in the beetle and it fire and idled for 15 or so seconds but that was good enough for me. So I went for a brew and a ponder, after this me and my dad though to about the taking of the engine out so on we go, it took a lot of jacking up and wood to get the car high enough. Once we had done this outcome the angle grinder to cut the rear clip off so it would be easier.
With much heaving and cursing the engine come out.
.jpg)
.jpg)
.jpg)
The once we had the engine out some more cursing to put the engine on the work bench so I can work on it.
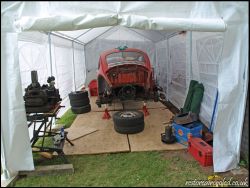
Hopefully we will be able to get the gearbox out before Tuesday so the good shell can sit in the shelter. Oh and one more photo as its put away for the night.
16/04/2011
So today I decided to take some parts of the engine to bit ready to clean up and put back together so on we go first the exhaust.
.jpg)
.jpg)
It was only a couple of bolts but the rust had taken grip so out came a hammer, it soon moved next it took all the carb, coil, dyno, dizzy and the fan and housing which left me with this.
A few bits left to do on the engine but I’m happy with the progress and I’ve took a few random snaps while I was there. Just to show how bad of condition the red beetle was
All I can say is hopefully my other car will be in better shape!
I’m happy to say that is full of spare parts such as lights, trim and pipe work. And of course the photo took before lock up for the day.
17/04/2011
The gear box was on the first thing to do, so I got my tools and me and my dad set about getting it out, we first undid the bolts holding the boots together the 12 nut (6 on each side) were some of the hardest bolts to undo that I’ve come across hitting the bolts with the trusty hammer seemed to free the rust making it that bit easier to undo. Then afterwards I undid the other cables and what not’s. Then it was onto the mount these had plenty of rust so the hammer was out yet again along with some releasing oil to get it going once we had undone them we then put the jack under the gear box and jacket it so that it sat off the mounts and pulled it forward, and that was that it was simple... ish we also managed to get the rest of the tin wear off the engine read to strip it, any way here are some pics
Once the gear box was round we then took it off the stand and put the wheels back on it.
.jpg)
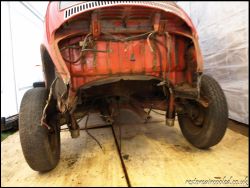
Note on the pictures above the amount of positive camber because there is no weight on the back wheels, I also moved everything so it was neat and easy to get the red car out and the white one in on Tuesday
.jpg)
And not for the last shot before locking it up for the night
19/04/2011
The day has finally come were my other ‘better’ beetle comes, I was like waiting for Christmas but it eventually come and it is in a lot better shape than the red chassis but it still by no means perfect a quick look of things means that the floor pans look as if they could need some tlc but I think it will make a very good chassis to start upon. And here is a few photos of when it first turned up.
As you can see from the photos the body has been braced because the heater channels have been replaced, I also replaced the wheels so it was all a matching set.
steel mini lite wheel look rather odd but they do then job I also unbolted the shell from the chassis read for lifting off when a few of my mates pop down.
As you can see from the photos they is more rust but it is all part of the restoration. I managed to rally a few of my mates round to give me a lift with the body so off with the body and on to a stand. Ohh and thanks lads for coming round.
.jpg)
I also got some photos of the rust and the general condition of the shell.
As you can see from the photos the body isn’t in a bad condition there are a few areas of rust but nothing too major just a little bit of patching will be needed but im sure when it comes to it there is a lot more hiding, now that I had just a chassis on its own it had the best spot in the garden, the gazebo.
.jpg)
Mean that the red beetle gets the joys of living outside for the time been.
I also took some photos of the chassis that I will be using, this doesn’t look too bad there is a fair bit of work to be done but I have seen worse brought back to life.
20/04/2011
Not a massive update but I managed to find the owner of beetle before the owner that I bought it off, which was a surprise the guy just happened to comment on build thread I found that he was the one that put 3 Empi 8 wheels on it. He was also the person who braced the shell ready. The guy was also the one that braced the body so he could start work upon it. I also found out that the previous owner was from Coventry, and he called the beetle ‘Ceasar’ so the beetle has a name.
21/04/2011
Did a lot of work today I spent 6 or so hours drilling out the spot weld that held the floor pans in place, this consisted of first chipping away at the tar/bitumen which had been used as seam sealer and sound deadening, this seem to take forever, then we got a wire brush on a angle grinder to get rid of all the crap that was sat on the spot welds then drilled the spot weld with a ¼ drill bit but don’t drill all the way, then swap the drill bit yet again for a special spot welding drill bit, but again this was only to go through the spot weld not to go through the metal underneath otherwise I will have nothing to weld onto when it comes to fitting the floor pans, the was about 70 to 80 or so welds to drill then a lot of hammering to take the pans out but it left us with these.
You can see from the photo that there was a weld ever inch or so, while doing this it uncovered some places that will need some patching up but it’s summat that shouldn’t be too bad to do.
These holes shouldn't be too hard to patch up just knock up a bit of metal and weld it in place, also we took the brake lines and master cylinder off as well at the rest of the from end, as you can see from the pictures above, while tidying up I also found a good spot for my seat as well
I some how don’t think that it will catch on!!! And the last shot before I close it up for the day.
23/04/2011
Well I’m skint I’ve spent up I decided to get some of the things I needed, got quite a few things such as
Engine Gasket Set |
Accelerator cable |
Heat Cable |
Heat Cable |
Clutch Cable |
Clutch Cable Conduct |
Heat Exchanges Pair |
Heat Exchange Fittings, With Aluminium Hose |
Exhaust Muffler And Silencer Kit |
Floor Pan Left |
Floor Pan Right |
Most of this should be coming shortly bar the floor pans that will be coming when they come in stock, which is expected in 4 or so weeks but this won’t slow the build down because I still have plenty of things to do in the mean time.
24/04/2011
Not the biggest update but it is still a update, today I started on the de tarring of the chassis, this has got to be the dullest job to do so I only could do it for a couple of hours before boredom kicked in, but I managed to get most of it don’t there is just a little bit left to do on the tunnel but it shouldn’t be too much.
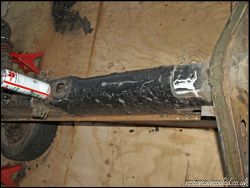
And here is the bit that I have got left to do, also in the photo below I scraped some weird glue off my chassis, that hasn’t set meaning it gets everywhere.
And not forgetting the tar that comes off the car.
And as a change from the usual last photo I stitched 5 pictures together from a different angle.
25/04/2011
Not much has happened today because I’m just waiting on paint and parts so I started to prep a few bits, all I did was get a wire brush wheel on the angle grinder and took all the surface rust off it I also found that some of the tin ware had a little bend in it that shouldn’t be there so out comes the hammer and it soon looked like the part that it should be.
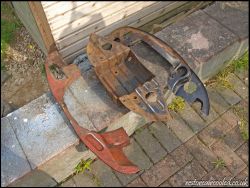
.jpg)
I also took the other two wheels off my chassis and had a good sweep around because the amount of crap that was on the wood was driving me mad, I have also received a email about the order that I placed with machine 7 everything should be here tomorrow apart from the exhaust because that will come Thursday. So I should have some good updates soon.
27/04/2011
Well waiting in all day has paid off my parcels have come, that’s right parcels I wasn't expecting the floor pan but it has arrived, the other one should be here within 4 weeks or so, as for my other parcel I now have loads of bits to fit to the engine, I will probably do this later in the week after I have sorted the other bits of the chassis together. Anyway as always here are the pictures.
28/04/2011
Well today some more parts have come, the exhaust from Machine7 which I must say is some of the best service I have had in a long time, I also had some POR15 come, and I also went out to get some VHT (very high temperature) paint for the heater exchanges and the exhaust. The colour I have gone for is matt black because its gives that OEM look.
29/04/2011
Not the biggest of updates again today, but a update none the less I have painted the heater exchanges and the exhaust with the vht paint that I got yesterday must say I am impressed any way I got a few pics.
Before
After
.jpg)
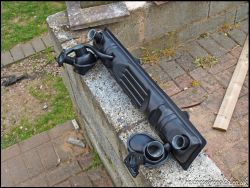
when my dad got home we decided to strip the engine read to clean and change all the gaskets. So off with the rocker covers and heads.
.jpg)
.jpg)
.jpg)
All simples really but when I managed to get the heads off in over covered a little problem.
Yep a melted piston, this isn’t the exact news that I wanted to see, I think its happened because the piston ring has snapped so it has over heated and melted. Only the one piston has done it. But I will have to find some pistons from somewhere. After I had found this I decided to look at the heads because I know that they are prone to crack so after a look at them I found one has cracked.
Strangely this is the head that was on the other side of the engine, it currently seems to be getting from bad to worse. But it isn’t anything that isn’t fixable. That’s all I got done. Ohh and I managed to get a few last photos before I locked it up for the night.
And I also managed to get the last shot before I lock it all up.
30/04/2011
Not a massive update but it’s getting there; we took the last bit of the old floor pan off ready to fit. We also test fitted the left hand floor pan because I’m waiting for the right hand floor pan to come.
01/05/2011
Well I have good news I have found an engine for cheaper than new pistons barrels and heads. £350 for a 1600 engine with code 'AB' on it so it’s a twin port engine that has just had a clutch change. It also comes with a Webber progressive carb. And they guy say the engine has done around 60,000 miles but I will still take this on to pieces and replace all gaskets. I shall be picking this tomorrow hopefully.
02/05/2011
Well after 250 miles 4 hours and £350 I now have a 1600 engine with a 2 stage progressive carb, get me not much to say really when I’ve got the time I will break the good engine for parts and then strip this one and change gaskets and clean it up. Anyway I did get some photos but they aren’t the best but everyone knows what an engine looks like.
04/05/2011
Well we stripped the new engine and took barrels rockers and heads off and I must say this engine is it lot better nick than the other one, the other bit that I like is that someone has converted it to a sump plug so it makes my life easier instead of doing all of the other bolts. It also had full chrome tin wear but it has seen better days I will remove this because it can cause overheating and I don’t fancy that happening really. I started to clean the heads up and lapping in the valves but then ran out of time so I will continue tomorrow.
05/05/2011
Today we started on a bit of a downer really because I looked at the head and the cracks are a little serious, so the gamble with the engine didn’t pay off which is a shame, but onwards and upward. I will order a top end re building kit. I started to warm the pistons up to get the pin out of the piston. Then one this had been done we started to take the head studs out of the engine so that they can be cleaned. Here is a photo on the left before on the right after.
To clean the stud I carefully put them in a drill at a low speed and use a blade to get crap off then fine sandpaper to get the nice and clean. We then took the flywheel clutch and other gubbing off the engine. Ready to clean the block
.jpg)
.jpg)
.jpg)
One I had done this I de greased it all ready to paint it when I get some paint.
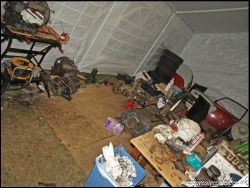
I would have got a photo of the whole workshop but it looks more like a beetle breakers yard at the minute so I didn’t bother.
06/05/2011
Whey my parts have finally come, really good service from vw heritage, ordered yesterday and they come today. Well I ordered a top end rebuild kit I didn’t realise how many bits it came with.
Safe to say a few bits came, right now that they are there might as well start building the head. First thing to lay out all the bits I will need to build it up.
So the first thing to-do was to Lapp the valve, this consists of putting some fin grinding paste on the valve so that they have a really good seal.
.jpg)
Put some grinding paste, and then make sure the valve has some oil on it then pop in into the head and spin, when its done it should look like this, after I have wiped all the paste off it.
All nice. Once all the valves had been done it looked like this.
Then on with the spings and all the other gubbings
.jpg)
Once I had got my head round the spring press I ended up with this
.jpg)
And then when they are all done I ended up with summat like this
07/05/2011
Still cracking with then we had to first put the piston ring on, but they all have to go a certain way but just look carefully.
.jpg)
.jpg)
.jpg)
Note all the writing on the pistons with all the spec of the piston on it. We then took all the bits down to the workshop; I first had to re seat the barrels so that a good seal was achieved so it don’t piss oil everywhere when its built.
.jpg)
I did this the same way that I had done the pistons before, by using grinding paste. When this was done it was then onto putting the pistons onto the rods.
Once this had been done we cleaned the rocker up and cleaned the streigher and the bottom of the sump but I havent got any pictures of this, we then after doing this went on to put the bots in the case, we notice that one went in more that the others, wierd.
.jpg)
.jpg)
And I did get one last shot before locking it up.
10/05/11
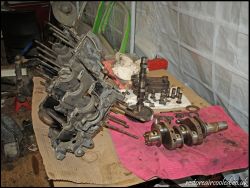
A little update but not much, we had the piston in as of the other day, we were just checking over them when we notice excess play so we thought it was best to split the block and have a look over it, bad news a lot of wear on the crankshaft so a new one is ordered, also new big end bearings, I did get a few photos so here they are.
14/05/2011
Not been doing much because I’ve been waiting on many different parts, but now they’re here so I can crack on with the building of the engine, first was to lay out the parts.
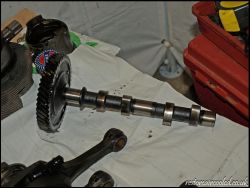
As you can tell from the photos the block had been cleaned and the crankshaft is a remanufactured to help cut costs down, and after a lot of heat and a little tap of the hammer the gears went onto the crankshaft. Then I had to put the conrods on, we referred to the manual which was a little confusing but we got there.
.jpg)
Next was to put it in the crankshaft and the cam shaft into one half of the block, and smear the sealant stuff that I decided to use.
The stuff that I was using on the block.
the next bit was a little fiddly because of the cam followers wanted to fall out but a little grease to hold them in a little but we managed it.
19/05/2011
Not a massive update but I went to Halfords and got some satin paint to paint the tin wear just to smarten it up. Anyway pics
20/05/2011
We went to fit the pistons and barrels but when we were fitting the barrels the rods were toot bit for the holes in the barrels so I phoned vw heritage and it turn out that they had sent the wrong ones, and that they were going to send some more tomorrow and take the other ones back. Sorted.
21/05/2011
The parcel has turned up, the best customer service I have had off a website in a long time. I would recommend them to anyone.
25/05/2011
I’ve not had too much time recently with coursework and extra hours at work to help pay for the beetle so I decided to paint the bock just to make it a little easier on the eye I decided I have some VHT matt paint already in so I picked that up and painted the block, once it had dried I didn’t like the finish because it just looked like dried oil, so I will nip Halfords tomorrow and see what they have got.
26/05/2011
A very small update, I went to Halfords and the best colour they had in was black so I got the gloss one that will hopefully look better.
27/05/2011
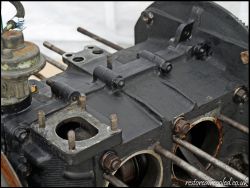
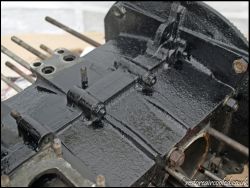
Managed to paint the block today with the paint that I purchased yesterday and it was tricky because I didn’t want it going into the block, but I soon managed it anyways the picture
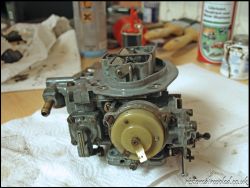
I also started to strip the carb and give it a once over and make sure nothing is broken or blocked so first I laid out the carb ready to clean it up
Then off with the choke and the top half of the carb
.jpg)
All the other bits and pieces jets floats etc
We went to put it back together but I ran out of carb cleaner so it will have to wait till tomorrow, also I have bought a few days ago a empi manifold that should fit on the carb, because the only one had holes is it.
28/05/2011
Today we got a fair bit done, which I was happy with because I can now see things taking shape, first thing we did was to put the piston rings on the piston, because the was a different set that the last ones then to squeeze the rings so that the piston would go down the barrels.
.jpg)
One we had done two we then had to fit the head and pushrod tubes, these is a little trick we did to fit the head so that the pushrod tubes just fit then fit the pushrods to just hole them in place, when made it easier than holding 4 tubes in place.
Then once done I had to torque the heads up in a certain order. And to fit the rocker, once fit the rocker I had to use the feeler gauge to make sure that the rocker is the correct distance from the pushrods.
.jpg)
Then on with the rocker cover and the clip, which was really tight because it was brand new.
.jpg)
When I had done this I did the carb because I was late and it took a while to do one side. The carb parts needed cleaning, once done the looked all new.
Then once all cleaned back together
30/05/2011
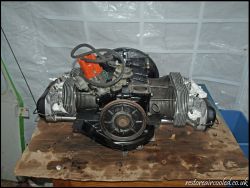
Well I a bit more work has been done on the engine I’ve managed to complete the other side of the engine, which is great, it is eventually starting to look like an engine. I didn’t bother with loads of pictures because they would just be the same as the other side. Only got a photo of when I had finished building it.
01/06/2011
Got a lot done today which was great, it is starting to look more and more like a engine, the first thing that we did was to fit 2 pieces of tin where that fitted onto the barrels.
Got some nice shiny screws to do all the tin wear too next was to attach the heater exchanges and the exhaust this was a tricky job because they had to all be shuffled are so that they would fit. Once bolted up the next thing was to use the new fitting kit that I had got to join the exhaust and the heater exchanges. This was very fiddly because there wasn't much space.
.jpg)
.jpg)
Yet not another job that wasn't too easy the manifold this would be easy but I have to glue/seal the manifold pipes, first thing to do was to fit it but not too tight then mark where the pipe goes. Then once this is done take it off and use the sealant to bond the pipes in place then bolt the whole thing down and fit the stabiliser bar.
.jpg)
.jpg)
Whey!!! more shiny nuts, right the fan housing was the next bit that we fit. This was heavy and it didn’t want to fit so a few choice words were said and a quick hit with a hammer it fitted. Once we had done this we left it as it was.
02/06/2011
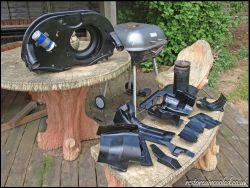
Not a massive update but a update none the lease, a few bits of tin wear fitted along with a new oil pressure switch and a oil filler cap.
03/06/2011
Now that my carb has been overhauled I need to make a gasket for it, I could get one from Webber but at £36 I think I will make one. That and I have never made one so it will be something new. First thing was to get a piece of cardboard big enough.
This come from a cereal box next was to lay it on underside of the carb, the side where you want to gasket. Then lightly tap round all the edges with the handle of a screwdriver just enough to mark it.
Then was the tricky task of cutting it all out very carefully and you end up with this.
.jpg)
Then to see if it fits all nice
.jpg)
And then to bolt it all together.
09/06/2011
Not the biggest update but the workshop was getting a bit messy and it was hard to get to work on the chassis so a quick tidy up.
15/06/2011
Cracking on with the chassis a needed to strip the rear of the car down so off with the trailing arms. This wasn't too hard because someone has had it off before the bolts weren’t too tight.
.jpg)
Once these were off it was off with the damper and the driveshaft, I also looked in the drums to see how bad there were. This was easier said than done we took the split pin out so we assumed that it wont be too tight. We were wrong it was silly tight but we managed to crack the nut so to speak. We then opened the drums to find all new pads and the drums weren’t original because there was no lip. This was good new means I don’t have to but new ones.
.jpg)
We put the drum back on so that we didn’t lose the bolt. And cracked on with the rust. It was my first time using a weld and all I had to do was weld a little hole and yeah, I went crazy but it will be ok one I’ve got the angle grinder on it.
.jpg)
I spotted a small hole on the underside of the chassis so I turned it over and wire brushed round the hole to have some nice clean metal to weld to, this is where it goes downhill. It revealed a few more holes.
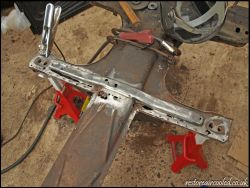
This is how I left it because I come to the conclusion to replace the bottom of the frame head, because I think that it takes a lot of strain so I want it to be done proper.
21/06/2011
Not a big update but I’ve pained a few bits suspension arms and roll bar; I’ve also cancelled the order of the floor pan, and ordered it from a different place because they were starting to take the piss. Anyway I didn’t get and photos because I’m sure you will see them later on in the build.
22/06/2011
I did some cleaning of the chassis with the wire brush to get all the crap off it but hopefully I will be welding the floor pans in because all my bits turned up today, also I started to work on refurbing the empi 8 wheels but this is just a little side job to do so they will be finished for when the chassis is.
23/06/2011
Major progress on the beetle which is good we had to weld the floor pans in but it wasn't as simple as just dropping them in and then welding them into place, it never is so we first put them into place and then marked up where will need trimming then back off trim them then put them back. We had to keep doing this until they fit nice. Then when we had don’t this we had to take it out and I put holes in ready for welding it into place.
Then once laid back down, we had to measure the bolt holes I could get some tacks down to hold them in place once this had done I could crack on with the other welds so I ended up with something like this.
.jpg)
.jpg)
.jpg)
On the back of the drives side floor pan we modified it because the existing brace that was there was solid so there was no point grinding it away. to then fix a new one
.jpg)
When the welds had gone cold I coated it all with Krust so that and rust I hadn’t spotted has become more ridged.
.jpg)
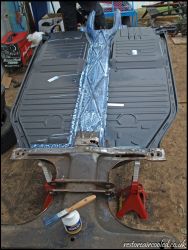
And that’s how I left it I will crack on with it in the morning.
24/06/2011
First thing was first I was to get myself down the shop and get some tiger seal to use as a seam sealer, I thought this was a good choice because tiger seal doesn’t come off with any ease so after I had got a couple of tubes I cracked on with the sealing of it, ive only done the top and the underside rear because im waiting for a part to come in the post.
.jpg)
.jpg)
Once this had been put on I could crack on with the krusting.
.jpg)
.jpg)
After I did this I started to crust the trailing arms but ran out to off to Halfords to get some more. After I got back I cracked on with painting it in krust again.
Once I had done this the tiger seal that I had put on the pan has dried so I could start prepping the chassis for paint, so I first got rid of all the sound deadening and ruffed up the new floor pans so that the POR15 has a good surface to stick to which ended up with this.
.jpg)
Once this was ready I could crack on painting, I was very impressed with the finish.
30/06/2011
Not the biggest update but I have painted my trailing arms with POR 15 ready to put it all back together also, the frame head bottom has turned up today so I will be welding that in place tomorrow, then it should start coming together.
01/07/2011
Update time, we didn’t get to the stage that I wanted to get to but I still got a fair bit done on the chassis, the first thing to do was to drill the spot welds that were hold the bottom of the frame head on, along with cutting it neatly before the suspension arms so that I can weld the new panel in without messing with the suspension geometry. In the process of drilling the spot weld the drill decided to be on constant hammer action so we took it to bit and remover the bit that has the hammer action. With this it was worse and now every time you use it its like a smoke machine but with just 3 welds left we used it. Anyway the pics.
Once I had done this I hovered all crap out of the tunnel and cleaned the metal so it will be a clean weld.
.jpg)
Once this was all cleaned I threaded the clutch cable through the tunnel because I thought it would be easier. When this was done I Krusted the metal.
Then on with the welding so the first bit.
Then with the second bit I had to drill some holes it because it was thicker metal that the floor pans, this meant a trip to the shop for a new drill.
.jpg)
.jpg)
Then once again cover it in krust.
.jpg)
Then on with the seam sealer, but I had to do all the underneath.
And then with the POR 15.
By this time it was too late to shults the car so I will have to leave it for tomorrow, so if all goes to plan there should be a update tomorrow.
02/07/2011
Did a little painting with the POR 15 I did the shocks on the back for the back of the car. Then later on I started with the shults, the first thing to do was to weld the accelerator pedal on.
.jpg)
Once I had done this the shults could begin, first we masked the area that we didn’t want the shults to get.
Once it was masked I could begin with the spraying with the shults. It took some getting though the gun but once it was going it worked great and left a nice finish.
.jpg)
.jpg)
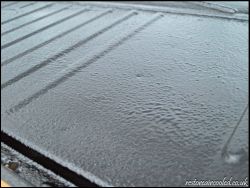
Hopefully the assembly will start tomorrow and start taking shape.
03/07/2011
Got some good progress today which I was rather happy with first up was to do the front arms which were straight forward the only bet that took some doing was to squash the bushes.
Then it was onto the IRS which then got tricky because we did have a tool to screw the strange bolt that held the trailing arms on so we decided to make one, simply weld two nuts together simples.
.jpg)
So now with my ‘special’ tool I can crack on with the trailing arms
.jpg)
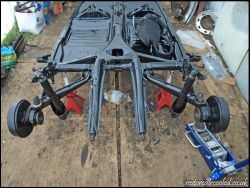
And that’s is for the night, I’ve also sold a few bits so the cost has come down
05/07/2011
I’ve made some more great progress I painted the front of the beetle with POR 15, then I started on the rear end again this time it was sorting the torsion bar which is just hard work, after a lot of messing about I managed to move the torsion bar to the correct place. Or so I hope then had the put the spring plate on, which has to be sprung in place by jacking it up. This caused a problem because the chassis has no weight to it so both me and my dad has to sit on the chassis but we eventually managed it. To hold it in place the torsion bar covers needed to go on, but I had got the ones which have spaces which clearly didn’t fit so outcome the hammer and mole grips and ended up with.
.jpg)
.jpg)
This now means that they fit which is brilliant, so now I can bolt one side all together.
.jpg)
We then decided that it was too hard to do the other side the same night, so I then started to the brakes. First on with the brake master cylinder.
.jpg)
Then once this had been fit I could crack on with the first brake line, which was fiddly because it was so long but we did manage to fit it.
Then we called it a night because it was the morning.
06/07/2011
Did some more work tonight which was great, I managed to install the rest of the brake pipes onto the chassis which was a straight forward task because I had kept all the old ones so I could just make them both the same so they fit just right. I also fitted some of the cables through the tunnel but I still need to order some more.
07/07/2011
A lot of progress done today which is really good, I’m at the stage of getting giddy because of things are starting to come together so on wards, the first thing was to sort the other spring plate out when seemed easier this time around, then on with the rear wheels and off the axel stands which is brill but have to remember to put a brick under the wheel to stop if from rolling off.
.jpg)
Then I had to sort the pedal box out so I had to get the welder out but after some drilling and welding they were in.
.jpg)
Next on list of bits to do was the front bit, I have a clue what its there for but I sealed it onto the chassis.
.jpg)
Then on with the front suspension I haven’t stripped these because I will be changing the discs but with storing the chassis outside I left the old ones on because new ones would just end up rusting, we hammered the struts on and made up a jig so that the car can stand itself up making it easier to roll about.
.jpg)
Its eventually back on four wheels which is great.
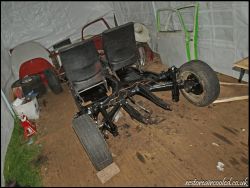
It looks brill; I’ve also ordered some more bits for the beetle.
08/07/2011
Didn’t get any photo’s today because all the work was to do with the tunnel, which was to thread all the cable that I have just bought though the relevant tubes but the problem was that the heater cable tubes are rusted shut so we will have to think of a way of clearing them or fixing them up.
09/07/2011
I managed to rally the troops so that we could all move the shell in to the workshop. So that I can begin to work on the beetle.
13/07/2011
I managed to get a fair bit of work done on the shell today although most of it was stripping it all the electrics and the sound insulation out of it.
.jpg)
.jpg)
It was a bit messy so Henry the Hoover also came and helped out.
And some of the crap I took from the car.
.jpg)
.jpg)
I also ordered a electric fuel pump as well.
16/07/2011
I started to clean up the rusty areas to see how bad the damage is, after a lot or work I uncovered this.
.jpg)
.jpg)
.jpg)
.jpg)
.jpg)
.jpg)
.jpg)
Once we had done this the front clip needed replacing so we set about getting it off, didn’t take much doing once the angle grinder was fired up, we ended up with this.
Then to test fit the new clip, I already had this as it come with the car.
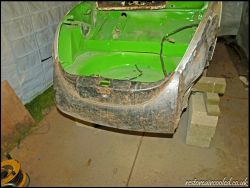
As for the stripping of the interior.
23/07/2011
Bit of progress today, I’ve been cutting away at the body to see what’s under the bad patches. As usual there is ‘bodging’ which includes what must be tiger seal to hold the heater channels in. To be fair there isn’t much in the front inner wing to repair. Anyways here is some photo’s.
29/08/2011
Right I best crack on with the build as its been a while since I have worked on it, I’m now at the stage where it is just cutting something out and welding a new bit it so the pics have suffered but I still have managed to do it. First bit was to repair the strut mount.
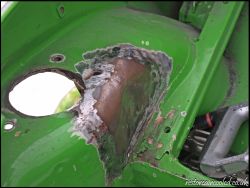
Next up was the door shut, just where the hidges go so as you can imagen this wasn't the easiest thing to do but after putting the door on then off then on we soon got it figured to we crack on with welding that up.
.jpg)
We also welded the heater channels in correctly and seam sealed it all up so that no water can get in the joint and rust all over again.
.jpg)
Also while on holiday I picked up some wings and some other bits so the costing has gone up
30/08/2011
More cutting and welding so off we go. First up was the frame head repair both sides first was the passengers.
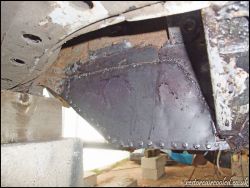
Then the other side all crusted and welded.
.jpg)
I had some scraps of metal left over and a little more time before it was dark so I welded a little piece to the very front of the beetle were it had rusted away.
.jpg)
This wasn't a easy piece because the metal wasn't very thick so I had to be careful with the welder.
31/08/2011
First things first this was what I was up against. A lot of weld that wasn't that strong.
.jpg)
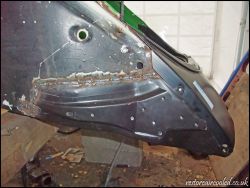
Then it was to cut out the inner wing, managed to get a photo of this as my dad was having a butchers at it.
.jpg)
Then it was to weld it all back in. But I have good news my welding is also getting a lot better. Well it holds.
.jpg)
.jpg)
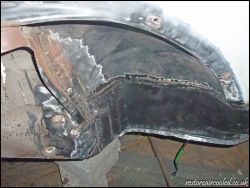
Its slowly getting there just taking some doing that’s all.
01/09/2011
More cutting more welding, again it getting hard work because I’m currently never seem to be getting anywhere but I best crack on with the work so onwards door shuts. So got some pictures of this.
All nicely welded in which is great took a lot of hitting and a few choice words which seem to have made it fit. I also decided to put the front end together to spur me on.
.jpg)
.jpg)
This seems to be coming along now and looking like a beetle.
02/09/2011
On with fixing the front part of the beetle this seems to take for ever because I had to make the panel out of a flat piece of metal but we eventually got it fitted and welded up.
.jpg)
.jpg)
And I also cover the thing in krust just to stop any rust coming up. I also knocked up another little bit for the front nose that had rusted away.
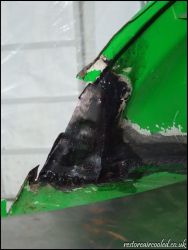
I also bought some stainless wing bold so I also had time to do the front of the front arch so welded that in.
09/09/2011
Front clip welding time this is the last bit on the front of the beetle to weld hopefully, but before that I had to weld some new bolts in place once they had been done then welded the front clip on.
.jpg)
And on with the bolts and the wings, I also put the bonnet on so that it looks complete.
.jpg)
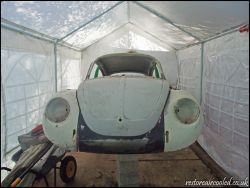
So that is how is how it stands.
15/09/2011
Starting on the rear of the car which makes a change from the front, the back doesn’t look half as bad, but after we had attacked it with the wire brush we ended up with something like this.
.jpg)
.jpg)
As you can see it isn’t going to be a simple fix, any way let get the grinder out and see what’s what.
.jpg)
.jpg)
.jpg)
.jpg)
Then we come across and massive chuck of metal so out with that too.
With then left the car looking like this.
.jpg)
So then I could start to make the panels back up, with wasn't very easy because it was a complex shape.
.jpg)
Now that that is welded all on I could then do the next piece on which was a lot more bendy but with the help of the hammer we managed to weld it all in place.
16/09/2011
More welding again didn’t manage to get much don’t this time but a little progress.
23/09/2011
This time it is to do the outside of the inner wing but the good news is that we got loads done today. It took a lot of doing because we used a little thicker metal because of the body mounting bracket needed to be fix, another problem we came across was the heater channel end plate replacement panel needed some convincing for it to fit but the big hammer seemed to fix the problem.
30/09/2011
Yes more welding, nearly finish the welding which can only mean that progress has been made, also some more good news the near side rear has had some welding but it is good weld so I’m not having to re do all of it so got plenty to done.
.jpg)
.jpg)
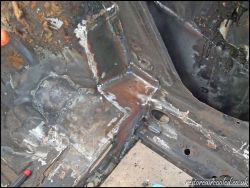
With the weather been well I flatted the two rear wings ready for spraying so there all nice and smooth ready for primer.
10/10/2011
Update time, not a massive update to be fair just spending a couple of hours prepping the bonnet and the two front wings ready for the primer with the help of mick who popped by, the wings are ok but the bonnet just needs a little bit more welding to it so I will do that along with the doors and the deck lid. Anyways photos.
18/10/2011
Welding time, meaning that the light is at the end of the tunnel which is great, first to weld up was the heater channel end plate. This took a little trimming and convincing with the hammer but it got there.
And then with the other little bit, this is on the part where the rear seats sits
The next bit to do was to put the welder down at to remove the valance because I want to have a removable one, which seams a great idea till I tried to take the old on off. To say it had some spot welds would be an understatement.
.jpg)
.jpg)
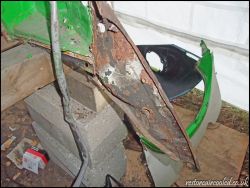
Just got to clean it up a figure a way of fitting a removable one in.
24/10/2011
Not a great deal done today but still managed to get some done, all today consisted was is cutting of the rear arch.
27/10/2011
Not many photos taken because I keep forgetting to take them but I made some good progress it managed to put the repair panel in, this looks a simple task but takes ages because you have to line it up with the other side otherwise the rear valance won’t fit. Anyway I managed to get a photo of it welded in place.
17/11/2011
Got plenty done today or it felt like it. We eventually after much cursing and hammering got the rear valance to fit just nice. One we had it all nice and fitted we had to weld washers in place so that the wing bolts can hold it in place, this was pretty easy. Just fit the washer and bolt and weld the washer in place but not the bolt. Simples
18/11/2011
Today was filled with the little bit that were left to do at the metal work stage of the shell, the first thing to do was to weld up the little hole in the rear valance.
.jpg)
The next bit was a little more welding; it was on the front of the car where there had been a few holes in it. But managed to weld it up very nice.
And yet not more things doing, this was just the simple krusting of the rear valance welds so they didn’t get any rust on them.
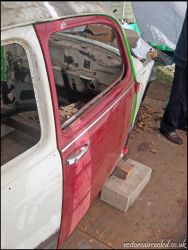
While I was at it we decided to fit the doors just to make sure they fit, they fit all nice after a little adjusting which was great.
.jpg)
.jpg)
Next was to tidy the workshop, this seem to takes ages because there was that much stuff on the floor.
And the last task of the day was to roll the shell onto its side so that we could Shultz the underside of it.
15/12/2011
Now that the beetle is on its side I can get to Shultz the underside of the cars, the first thing I had to do was to make sure it was clean so it will stick to the car when I spray it on, and then after this I need to mask it up so I don’t get Shultz on the bits I don’t want to. I forgot to get pics of this because I was so busy.
After I had masked it was ready for the Shultz, this is the results I got.
.jpg)
.jpg)
.jpg)
Once this is all dry I can put it the correct way up.
24/12/2011
Yes Christmas Eve and I have worked on the beetle, not much though because it is cold, and everything you touch is. The first thing to do was to clean the arch ready for stone chip, one I had done this I kusted it just to make sure nothing turned to rust.
.jpg)
.jpg)
One we had done this we then rolled the car the correct way up and rested it on some wood.
.jpg)
.jpg)
.jpg)
When we put it the correct way we noticed a little hole in the arch so out came the welder to sort that out.
.jpg)
And that all I did today because it was very cold.
03/01/2012
Didn’t do much today as we didn’t have too much time, but we had another look at the doors, After looking at the white ones they looked as if they had been modified so we got another set of red one which was just lying about. So we fitted one of them and it was a good fit the first time around. So I am going to repair the bottom of them and use them on the beetle.
06/01/2012
First thing to do today was to wire brush the arches to get the crap off then so that the stone guard will stick to it.
.jpg)
Then after that we needed to seam seal any last bits that we had missed. There wasn’t too much just the interior area. But before that we krusted the area where there was any little bits of rust.
.jpg)
While all that was drying I decided to take the steering linkages apart because all the boots and rubber were not good so they need replacing. Luckily I had a air gun so removing the rusty bolts wasn’t too hard.
.jpg)
Then the next step was to make up any area that didn’t need stone guarding this took some time but eventually got there.
Once masked up it was time to spray the stone guard this took some doing because it’s a very thin paint and it took a lot of doing. But managed the first coat on I will do another later on when it has set.
12/01/2012
Didn’t do much today, all that I did was to por-15 the gearbox and the steering linkages so that they look all nice again. Anyways I managed to get a couple of pics.
13/01/2012
Managed to do a few things today, the first was to paint the steering box and idler that I had forgotten to do previously which turned out well.
We also sorted the gear box brace and painted it but I forgot get to get a picture of that. Next on the list was the last coat of stone chip, and that god for that its horrible stuff to use, but it does give a good finish anyways I got plenty of photos.
.jpg)
.jpg)
.jpg)
.jpg)
And that all that I managed to do but the paint prep will be soon underway.
22/01/2012
I managed to get a few hours in on the beetle today, and I spent my time prepping the body for paint I used the dual action sander on the roof and rear 3 quarters and then used just sand paper on its own. Took a while but I did get a lot of the panels prepped. I did manage to get plenty of photos but they aren’t too good as it was rather dark when I took them.
.jpg)
.jpg)
.jpg)
.jpg)
.jpg)
You can’t tell which panels have been prepped but the roof and sides have been prepped all that now needs prep is the engine bay and the under bonnet area also the front valance. And then the whole of the interior.
23/01/2012
More prep work, I’ve managed to completely do the front 3 quarter on bother sides and I have also done the roof and scuttle area. I’m not onto the more fiddly bits such as the engine bay and under bonnet area but I have started the under bonnet area. And I did make a start on the dash as well any ways I managed to get some photos.
27/01/2012
Started to work on the doors first thing was to mark the area, which needed to be cut. So here is the photo.
.jpg)
And then simply cut a lot the line which revealed the other side.
We then went to weld in the part that we had bought off eBay, but as we went to fit them we noticed that the inner parts are sided and even that I bought a left on and a right one the part numbers were different but they were the same part so that all I could do today.
02/02/2012
I didn’t get any photos I had simply forgot to because I was too busy trying to keep warm as its on -2 and I’m still yet working on the beetle but, today I managed to finish the drives side door because I went and got the new part from the guys down gsf as they did me a good deal. It all went well. I will have some photos tomorrow.
03/02/2012
Managed to get plenty done today with was rather good, the first thing to do was to see if the finished door that we did yesterday lined up of if we had completely messed the whole thing up, and after a lot of adjusting and hitting of hammers we managed to get it all lined up all nice. Got the photo for proof too!!!
.jpg)
Not the best photo but you get the idea, the next thing to do was to repair the other door, this didn’t seemed as rotten at the bottom as the drivers door but by the time we were done we ended up using the same pieces, this one went easier because of the practice on the other door, only managed one photo of the seam sealer drying/setting.
.jpg)
Also while my dad was helping out with that I whipped out the DA to prep the deck lid, the outside was simple to prep, it has had some filled but it doesn’t look too bad. As I went to do the inside it wasn’t as easy as there are plenty of little fiddly places that need prepping, I didn’t get it all done but did some work on it.
17/02/2012
Back to working on the beetle again, didn’t get loads done but it was some little bits that needed doing, first thing on the agenda was to do the bonnet seal holder (the little metal strip). To do this I first had to cold galvanise spray the strips and where they were been welded to..jpg)
.jpg)
Next was to then clamp them and weld them in place, this took some doing as its only thin metal but managed it in the end. Also painting some more galvanise spray onto it to for safety.
.jpg)
Also managed to prep the passage door and both front wings, I didn’t get any photos because I forgot and everyone know what a door looks like
18/02/2012
Spray time is wasn’t the best conditions and the tent is getting cramp now but I still soldiered on and managed to spray the inside of the door, and the passenger wing, the wing has a couple of little dints but I lick of filler will soon sort that out. Nothing much to say but grabbed a few photos.
19/02/2012
Finished doing some more priming today as it was good weather; I did the other wing that was already prepped, here is it sat in primer.
Then onto the other side of the door so I can see what area I have to fill. But it does look better been one colour
Also when it had been sprayed I have seen a little bit that I didn’t weld correctly, so I will get the welder back out to sort that problem out.
24/02/2012
Well its filler time, and what a job that can be. Its a lot of sanding and applying. So not much of a right up but we all know what filler is. Anyway on with the first skim of filler..jpg)
Sand that down till and then apply the next lot of filler, to get the low points
.jpg)
Sand that down, and apply a little bit more
.jpg)
And sand that some more, and ended up with this
But looking at the panel it needed some more
.jpg)
Its near as dam it but my arm is arching, it may seem like a lot of filler but it’s a few thin layers built up. We also managed to fee the heater cable holes at the back of the chassis, so we threaded wide copper pipe through so that the cable can get through.
02/03/2012
More and more sanding, first off was to put another layer of filler onto the door. And we then put some matt black aerosol onto it to see where the high parts are and there are a few low bit so it does need some more filling putting on it.
I mixed so much filler I put some on the other little area so it didn’t go to waste. Any way I got some photo’s not great ones.
.jpg)
.jpg)
With them bits done I was going to put some more filler on the door but. I really lost faith so I prepped some of the engine bay.
03/03/2012
Sanding, sanding and yet not more sanding, but I’m sure it will be worth it in the end. The right up will be getting shorter because they are all about the same think which I prep. Anyway the first thing to do to-do was to do skim the door.
And while that was going off I etch primered the other parts that will need some filler putting on them.
Next up was the last little bit off filler on the door.
As I had mixed up a little bit too much filler I decided to give the rear three quarter panel and skim.
.jpg)
Then it was to sand the three quarter down.
.jpg)
It needs a little bit more work but nothing too major. I would have mixed some more filler but I was getting tired and I wanted to finish the door off. So I set off sanding again and managed to finish it.
05/03/2012
More and more prep, the driver’s door is 90% finished all that needs doing to it is a little touch of stopper to get rid of the little marks in the doors but nothing major..jpg)
Next up I worked on the rear three quarter panels but got arm ache before finishing.
06/03/2012
Still on with the filler, I managed to get some stopper to do the doors so I applied that where it is needed on both doors.
.jpg)
.jpg)
While this was drying and to have a break for all the sanding I found some bumper irons that looked a little rough, so I wire brushed them and then painted them in some por15 and they have come up like new.
Then it was back onto using the filler, this time it was the 2 rear three quarters so some more sanding and a little bit more filler.
We then called it day and went for a cuppa.
08/03/2012
Well I’m still ploughing through the filler stage but have managed to get plenty of it done, and I must say it is starting to take shape. All of the major bits are done. First up is the rear three quarters
Next up is the lower B pillars
.jpg)
.jpg)
.jpg)
I also managed to finish off the inside of the door
And there was the strut top
Lastly the rear valance needed a little tlc too.
10/03/2012
Well we’ve defiantly put some work in today, got loads done and generally made good progress first up was to stone chip the engine bay because it seems to be a good decision as it is an awkward area to get a mirror finish on.
Then behind the dash area as you don’t really see this bit.
.jpg)
And then while that was drying it was time to sort the last bits of prep out.
Then it was time to mix the primer, I know this isn’t the best way of doing it but its work for the past couple of years.
.jpg)
Then the bit I’ve been waiting for, spray time. Eventually did it miss a few bits and it only dusted n in other places but I need some more primer. But I’m rather happy with it been all one colour.
11/03/2012
Today I managed to get a couple of hours at the beetle, didn’t do any spraying as I’ve ran out of primer so I need to go get some tomorrow. But I still managed to sort a bit of the wiring loom this is the front light section of the loom, had to repair a fair few wires as some hadn’t been soldered just wrapped round each other. And some had scotch locks which I don’t want in this car. Anyway here it is finished.16/03/2012
Managed to get plenty of body work today, it really coming together now. So the first thing up for spray was the doors in etch primer.
As you can see by the pictures I have a nice rack to hang anything off which seems to be a life saver at the minute. Next up was the deck lid and the under bonnet tidy thing. The deck lid needed a little bit of filler but it looks alright now
Then after that that it was onto the bonnet, this also needs a little filler where it had been welded earlier, this was an awkward panel to spray even on the jig but I still managed to do it.
Will plenty of light still we prepped the 2 rear wings and gave them a coat of primer.
As there was a little bit of primer left in the gun I quickly did the deck lid handle.
I also quickly sprayed 2 wings in the 2 different colours I’m trying to pick. This wasn’t the best spray it was just to have a look at the colours.
I have picked the colour but I won’t be saying until the colour coat is put on.
29/03/2012
More primer, this time it was high build primer so it will start to take shape, I did all the priming in one go, but stopped half way through for a minute and the primer set in the gun so after some cursing I managed to clean it all and coat the whole lot in primer.
.jpg)
.jpg)
.jpg)
.jpg)
.jpg)
.jpg)
31/03/2012
Having picked up some very cheap door I decided to give them a test fit, and thank god they are perfect fit a nice equal gap all the way round the door.
07/04/2012
Now the boring part of the spray job starts, the flatting process begins, a little trick to make sure it was really as flat as it could be is to dust black on so when it’s all gone the primer must be flat. Not much to say really but I managed to get some photos.
08/04/2012
With me getting new doors they had to have a lick of etch and high build primer so it was on with that.
20/04/2012
A lot of wet sanding has been happening over the last couple of days but there haven’t been any updates because all it would be is the same thing over and over so I cut it out and concentrated on getting the panels perfect ready for painting as I want it the best it can be. Here are some photos of it all wet sanded.
.jpg)
.jpg)
.jpg)
.jpg)
.jpg)
.jpg)
Also today is the day it will be going to the body shop for the colour, I was going to do it myself. But I got talking to a guy who can do it cheap for me at a proper spray booth so I’m going with that, so first think was to get the body rolling so on with a home mod.
.jpg)
Then it was to load the Freelander and my Clio to take it the body shop.
I didn’t get any of it in the trailer as I was running late.
23/04/2012
I popped down to the body shop to just do a last few bits on the beetle shell, I sanded the wheel well area down under the bonnet and under the deck lid.
24/04/2012
I has some more work to do to the beetle I finished up a few little bits I could see and sorted the b pillar out of the driver’s side.
25/04/2012
Now that the body is at the paint shop I still have some work on the chassis to do before I get the body back home, first up was to strip the front of the car down, so outcome the air gun and off came everything, all the hubs backing plates and struts were stripped. Here are some pictures I grabbed.
.jpg)
Once I had took the struts apart I had a look at the lowering springs.
.jpg)
As you can see from the photo the spring on the right is very bent, so not taking any chances a new set of lowering springs have been ordered. Next on the things left to do was to poly bush the clutch, so after I put in together I seen that it was loose so to tighten it I used the trust hammer.
.jpg)
Once that was fitted I could fit the steering uj covers.
27/04/2012
First thing to do today was to clean and prime the bits that I had taken apart last time, here are some pictures
While the primer was drying I thread locked the studs in on the drum at the back.
Once that was done I looked at the front struts, the inserts need replacing as the both leak and the strut itself needed some welding, so out came the welder.
.jpg)
Also the new springs came as you can tell they are miles better than the ones I took off.
.jpg)
Now that the primer has dried I can get on with painting everything in por15.
28/04/2012
The strut inserts have arrived but they are for the 3 bolt mounting shocks, so I will be sending them back and getting new one, but this doesn’t mean that I can’t get on with some, I can put together the hub disc and calliper.
.jpg)
.jpg)
They now look all nice a new, then was to fit them onto the car. I also put the steering bits and pieces on just to see how they fit.
30/04/2012
I now had to have a look at the dash as it had seen better days, after some cleaning gluing and painting it came out looking like.
Now that that had done, the seat cover that I had ordered turn up and so we cracked on fitting them.
01/05/2012
First up was to finish re trimming the seats, this time is went easier because we had already done one seat so we knew what we were doing.
.jpg)
Then work on the chassis continued, we mounted the gear box and connect and greased both drive shafts. We also connected the clutch cable to the clutch.
25/05/2012
Well the day had finally, after many days in the body shop helping out prepping the beetle so it’s at the best it can get; it is time to get the beetle back, as I hadn’t seen another beetle in the same colour I was unsure if it was the correct colour, but soon as I seen it, it was the correct colour. Anyway here is it as it got to mine.
.jpg)
.jpg)
.jpg)
.jpg)
.jpg)
Now that it is back home there is just a few bits to sort on the chassis before we attempt to put the body on it. The first was the steering and the body gasket.
.jpg)
Then with this done all the lads popped down to give a lift with the body. And ended up with this.
Now I’m happy, I’m getting there.
26/05/2012
Paint time, I was going to take the fuel and the wiper motor cover but I wanted to paint them myself so it was out with the 2k black and out these come.
.jpg)
.jpg)
.jpg)
While I’m on with making things shiny, I cracked out the machine polisher to polish up the body again and give it a good coat of wax. The bodywork looks stunning.
28/05/2012
Next up was the rest of the bolts in the body, this was too easy but after a little elongating they fit lovely. Not got a picture because it is just bolts.
29/05/2012
A lot of work went into today, the first thing to do was to sort the front struts out this was because the strut top was too small so had to be filed to fit the strut in it, this seemed like an easy job but took plenty of time. Next up was the brake system all that was left to do was the flexible hose from the body to the strut and then the copper pipe from the strut to the calliper. So that went on no problems. Next up was to bleed the brakes but this wasn’t easy so after it been 1am I decided to call it a night. But just as I was packing away I just put the front loom in as it was lying about.
01/06/2012
First up today was more wiring this time it was the engine loom that needed to be done, it needed a few little bits doing and for new covering to be put on the old loom so that it looks all neat and tidy, it ended up looking something like this.I also have to fit the engine tin wear sear round the back of the engine bay as once the engine it you can’t get to this so in it goes.
And then finally wheel the engine down to the workshop.
After a lot of messing about with jacks and what not, some choice words later the engine is in.
.jpg)
It took some doing but managed to get it in. can’t start it just yet as there isn’t any wiring done nor is any of the fuel system, but it slowly getting there.
05/06/2012
Now it is onto the most boring bit of the build the wiring loom, there seems to be wiring everywhere. Mine seem to bit on the years they changed things so it a lot of modifying. Any way I managed to get a photo although it isn’t much to look at.
08/06/2012
Well back to the beetle, next up was the wiring at the front of the beetle so basically the light loom, once this was all roughed to the ‘main’ loom then the fuel tank could go in, so that was next we put that in and it fit rather well apart from the filler neck been tight and I also needed the rubber seal/grommet that goes round it.
I didn’t get any photos because I was too busy grafting and trying to make good progress.
Now that the tank and the other bit of the loom is there it is time to fill it up and turn the engine over, so after some juice I turned the key and no engine was turning. Out some the tester, we had forgot to connect the starter motor.
Try to start again, we have the fuel pump primed but it was firing out of the carb so once it was timed up it was to try again. And 2 turns later it fired a lovely idle and picks up great.
Now that it starts I put the timing light on it and adjusted the timing so it was just right.
12/06/2012
More electronics this time it was more to neaten the electrics that are already there. So it was a case of cable ties and what not. And I still have no photos.
15/06/2012
Alarm time, not giving away details of the alarm wiring but it taken ages but it final works. Not that the alarm is done the sound deadening can go it. It feels like I’m getting somewhere now was easy really just cut to size and stick. And ive got a couple of photos.
16/06/2012
Nothing has changed but I have taken a couple of vids, one of the alarm working and the other turning over and firing.
29/06/2012
After been busy with college as it is the end of year and course, I now have time to crack on finishing this beetle first up was the heater pipes, I thought this was going to be a ten minute job but I was wrong, the pipes that fit to the body would fit between the torsion bar and the body, the only way to get round this problem is to lift the body so. I loosened all the chassis bolts and lifted it just enough to get the pipe in and then the flexi to go in. and the pipe that going on the inside could be clipped in.
30/06/2012
Got plenty of work done on the beetle, first up was the headliner, which is rather hard as it has to look neat. First up was all the bits apart from the roof, I masked the car off so that I didn’t get spray adhesive everywhere. Once these are in we moved onto the roof, I managed to get some in process shots.
.jpg)
.jpg)
.jpg)
.jpg)
.jpg)
And soon enough after a lot of pulling and pushing the headliner is in. and to make sure that the ends round the windows don’t peel back I put the front and rear screens in, as I can’t put the side windows in yet because I’m waiting on a delivery. The windows went in easy but the chrome trim didn’t as it was all twisted and what not.
.jpg)
The next bit to do was underlay for the carpet this bit was very easy and you just stuck in down and it was done.
The last job of the night was the dash which didn’t go in too bad once the steering column was loose.
10/07/2012
First things first the rear window seals have arrived so that was top of the bits to do. It was a tricky job but one of the windows did take some convincing to go in.
Next up was to sort the carpet out, this took some doing as it was a lot of random shaped pieces hand all you can do it make an educational guess, but after some chin scratching it all in which looks really nice and tidy. I managed to get some photos but the handbrake gator isn’t on correctly.
13/07/2012
After ordering my tyres for the empi 8’s I eventually got them fitted today, and put them on the car so I can look at how it will sit, I didn’t get a photo of how it sits because you can’t tell without the wings on. But I got a photo of them on.
.jpg)
The wiper mechanism cover was up next a few speed clips and bolts later it was fit, I also wired up the horn but there are no photos of that.
Next up was under the bonnet it has got carpet but it needed some board to mate the carpet sit correctly so I some board and cut it to shape.
After all that it was onto the bonnet lock this wasn’t too bad once I had found the correct screws it soon fitted, and happened to lock and fit correctly the first time which was a bonus, I also fitted the vin plate back on with the aid of two pop rivets and also put the pin switch in for the alarm system.
14/07/2012
First up was to Shultz the undersides of the four wings, the masking took forever as I didn’t want the Shultz to come through onto the other side, but it when on great and it didn’t start rain until I fished spraying which was great.
The next job was to spray pure guard onto the carpets so water does absorb as easy, I didn’t get a photo but it does look any different.
The last jobs of the day was to remove the glue from any parts of the body and to go round and tap all the holes for the wing bolts to go through as I hopefully will be fitting them tomorrow.
18/07/2012
Only had a spare hour or so I concentrated on getting the deck lid all sorted so this meant putting the handle lock light and drip tray on it which too some sorting but managed to do it, then we put the lid on and lined it up why took some doing because they bolts aren’t too easy to get to but eventually did it.
.jpg)
But on closing the deck lid I have noticed that the drip try hits the carb so I will have to sort that out later. The next bit to do was the spring which was a sod to do and was really tight, anyway managed to get it fitted.
19/07/2012
With having some good weather I thought that it would be a good idea to roll the beetle out the workshop so that there was plenty of space round it to work on it.
.jpg)
.jpg)
First job of the day was to test fit the rear valance and put the seal into place and the seal was a little tight but didn’t really cause any problem and the valance fit great so got that all sorted.
Next up was the number plate, 2 minute jobs just a few measurements and it was sorted. With the help of two rubber washers used as a stand-off and it’s sorted.
Next up was the rear interior which was the door cards and rear bench, the door cards needed a couple of holes in them for the clip holder thing to hold the rear bench to bolt to but other than that it all went in as it should, and the kick panels just slotted in place.
.jpg)
Then onto the front of the car it was to put the front wings on this was hard work as there weren’t the correct shape and with the been original they didn’t want to bend but after two of us wresting with them both wings were on with the wing beading in place.
I also put the bumper irons on but I think there wrong as they don’t look quite right, and as I put a bumper up to them you could tell they were wrong as they are bent and after using the hammer and what not they don’t fit so im off to buys some new ones.
After that I fitted the front seat, simple one screw and that’s it.
Really comfy I was going to drive the car back into the workshop but it wouldn’t start, had a quick look but can’t find the problem all I know is that there isn’t any power to the coil, anyway that’s a day I got a couple of photos before it got put away for the night.
21/07/2012
It was back working on the beetle and it seems to be looking more and more like a beetle now as the first thing that we did was to fit the rear arches these were easier than the front arches because they are reproduction parts so they can be bent a little better.
I also fitting the passenger seat it was a two minute job as I knew how they fit from doing the other sides. Next up was to fit all the lights which weren’t too hard. And we also fitted the seat belt which took some doing but it didn’t take too long to make the fit correctly.
.jpg)
.jpg)
I also managed to fit the sun visors and the interior mirror a 2 minute job.
Next up was to hang the doors, this wasn’t too bad as we had fit them before they went off for paint so it only took a little bit or moving to get them just sat right, we also started on building the driver’s door.
27/07/2012
Eventually got both doors up after replacing the quarter light seals as they were in a sorry state and needed replacing, I also had bought some new bumper irons so I could mount the front bumper because I had the wrong irons or they were bent, after some convincing the front bumper went on and so did the number plate although that needs changing as it was the bent set I put on just in case I messed the holes up.
28/07/2012
Quite a set back as we were looking at the chrome trim the goes round the window we noticed it had to go on before the rest of the quarter glass and drop glass so it was a strip down and re build of both door which was crap but at least we knew how it went together, I also clipped on the chrome trim which made the car look great
29/07/2012
Got plenty done today first up was to finish the door which meant putting the door pin switches in this wasn’t too hard job really as there is plenty of space in the doors, the hard bit was to find the correct wire from behind the dash but after some reading of the instruction we soon found them and got it all sorted. Next up was to put the door cards on along with the window winders door pull and door handle so it looked like this.
.jpg)
I also got a couple of photos of how it currently stands as I’ve been forgetting about getting photos.
31/07/2012
First up was a nice easy job of putting the wing mirrors on this was a two minute job but it looks smart now that it’s done, then next up was a big job of changing the bushes on the torsion bar to poly and to lower the passage side this took some doing but we put in back together and the passage side is still sat high so it will require re doing but that it a job for tomorrow.
02/08/2012
It was back on with messing with the ride height again hopefully it will be correct this time, after some messing about it’s the same height which is nice low, next up was to finish the rear bumper so on with the bumper irons and then the bumper itself, this went on a lot easier than the front which was nice. And also to fit the running boards. Once these were all done it could go to the mot test station tomorrow
03/08/2012
Well it’s the big day for the beetle mot time; first thing to do was to move it out of the tent and give it a quick wash, so that it didn’t look as if it was a barn find. Next up was to drive it. Round to the front of the house, this wasn’t too bad but once it was on the street it was strange been able to drive it on the road, but to the mot station. Unfortunately it didn’t pass just a few little bits so off home to sort that out, it failed on wheel bearing tie rod end, and too much play near the spring plate, so replaced a bush, tighten the wheel bearing and a new track rod late it was ready, but they couldn’t fit me in till 2 so I risked it and when and got the tracking sorted out. Then it when to the mot station and passed, I sorted the tax out and notice that in the mile or so run to the tracking place I had rubbed a ridge in my tyres so it was pulled to the workshop to higher up a little bit.
04/08/2012
Right I need to higher the back of the beetle up so that it doesn’t rub on the tyres so up one spline, didn’t both side after some hitting with hammers it was done. I let it off the axel stands and one side was higher than the other so on with the axel stand again and mess with it more and it wouldn’t sit level, but it was getting late so called it a day.
05/08/2012
Time to sort the torsion bar out again, after looking on the internet it needed to be moved at both ends. So out it came and got changed once done lowered off the stands and that wasn’t low enough, back up try again and it was level. Eventually I can drive it; the first place that it needs to go is the fuel station so after a quick run there is was running great. Even managed to take it out and grab a quick photo.

.jpg)
.jpg)
.jpg)
.jpg)
.jpg)
.jpg)
.jpg)
.jpg)
.jpg)
.jpg)
.jpg)
.jpg)
.jpg)
.jpg)
.jpg)
.jpg)
.jpg)
.jpg)
.jpg)
.jpg)
.jpg)
.jpg)
.jpg)
.jpg)
.jpg)
.jpg)
.jpg)
.jpg)
.jpg)
.jpg)
.jpg)
.jpg)
.jpg)
.jpg)
.jpg)
.jpg)
.jpg)
.jpg)
.jpg)
.jpg)
.jpg)
.jpg)
.jpg)
.jpg)
.jpg)
.jpg)
.jpg)
.jpg)
.jpg)
.jpg)
.jpg)
.jpg)
.jpg)
.jpg)
.jpg)
.jpg)
.jpg)
.jpg)
.jpg)
.jpg)
.jpg)
.jpg)
.jpg)
.jpg)
.jpg)
.jpg)
.jpg)
.jpg)
.jpg)
.jpg)
.jpg)
.jpg)
.jpg)
.jpg)
.jpg)
.jpg)
.jpg)
.jpg)
.jpg)
.jpg)
.jpg)
.jpg)
.jpg)
.jpg)
.jpg)
.jpg)
.jpg)
.jpg)
.jpg)
.jpg)
.jpg)
.jpg)
.jpg)
.jpg)
.jpg)
.jpg)
.jpg)
.jpg)
.jpg)
.jpg)
.jpg)
.jpg)
.jpg)
.jpg)
.jpg)
.jpg)
.jpg)
.jpg)
.jpg)
.jpg)
.jpg)
.jpg)
.jpg)
.jpg)
.jpg)
.jpg)
.jpg)
.jpg)
.jpg)
.jpg)
.jpg)
.jpg)
.jpg)
.jpg)
.jpg)
.jpg)
.jpg)
.jpg)
.jpg)
.jpg)
.jpg)
.jpg)
.jpg)
.jpg)
.jpg)
.jpg)
.jpg)
.jpg)
.jpg)
.jpg)
.jpg)
.jpg)
.jpg)
.jpg)
.jpg)
.jpg)
.jpg)
.jpg)
.jpg)
.jpg)
.jpg)
.jpg)
.jpg)
.jpg)
.jpg)
.jpg)
.jpg)
.jpg)
.jpg)
.jpg)
.jpg)
.jpg)
.jpg)
.jpg)
.jpg)
.jpg)
.jpg)
.jpg)
.jpg)
.jpg)
.jpg)
.jpg)
.jpg)
.jpg)
.jpg)
.jpg)
.jpg)
.jpg)
.jpg)
.jpg)
.jpg)
.jpg)
.jpg)
.jpg)
.jpg)
.jpg)
.jpg)
.jpg)
.jpg)
.jpg)
.jpg)
.jpg)
.jpg)
.jpg)
.jpg)
.jpg)
.jpg)
.jpg)
.jpg)
.jpg)
.jpg)
.jpg)
.jpg)
.jpg)
.jpg)
.jpg)
.jpg)
.jpg)
.jpg)
.jpg)
.jpg)
.jpg)
.jpg)
.jpg)
.jpg)
.jpg)
.jpg)
.jpg)
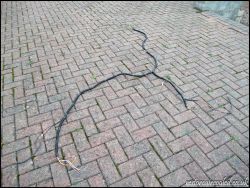
.jpg)
.jpg)
.jpg)
.jpg)
.jpg)
.jpg)
.jpg)
.jpg)
.jpg)
.jpg)
.jpg)
.jpg)
.jpg)
.jpg)
.jpg)
.jpg)
.jpg)
.jpg)
.jpg)
.jpg)
.jpg)
.jpg)
.jpg)
.jpg)
.jpg)
.jpg)
.jpg)
.jpg)
.jpg)
.jpg)
.jpg)
.jpg)
.jpg)
.jpg)
.jpg)
.jpg)
.jpg)
.jpg)
.jpg)
.jpg)
.jpg)
.jpg)
.jpg)
.jpg)
.jpg)
.jpg)
.jpg)
.jpg)
.jpg)
.jpg)
.jpg)
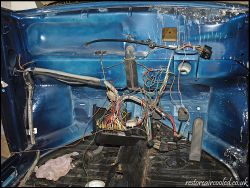
.jpg)
.jpg)
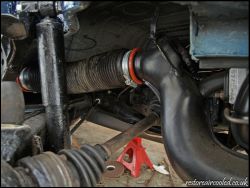
.jpg)
.jpg)
.jpg)
.jpg)
.jpg)
.jpg)
.jpg)
.jpg)
.jpg)
.jpg)
.jpg)
.jpg)
.jpg)
.jpg)
.jpg)
.jpg)
.jpg)
.jpg)
.jpg)
.jpg)
.jpg)
.jpg)
.jpg)
.jpg)
.jpg)
.jpg)
.jpg)
.jpg)
.jpg)
.jpg)
.jpg)
